
🐮 SwiftUI Tools w/ VisualStudio Code
 The Swift Package Manager
coming with Swift 5.5 now supports the
The Swift Package Manager
coming with Swift 5.5 now supports the
@main
attribute.
We can use that to build apps using just
VisualStudio Code and SwiftPM,
no Xcode involved!
Let’s use it to build a
Cowtastic app!
This is an updated version of SwiftUI Tools w/ just SwiftPM using the new Swift support for Visual Studio Code.
The
@main
attribute was actually introduced in earlier, but starting w/ Swift 5.5
it is now also supported in Swift Package Manager.
(ObjC.io also has a nice pre-@main
article
about this, requiring more boilerplate.)
This is what is possible now, w/o having to use Xcode:
import SwiftUI

@main
struct HelloWorld: App {

  var body: some Scene {
    WindowGroup {
      Text("Hello World!").padding()
    }
  }
}
Produces this little thing when it is run:

Installing VisualStudio Code w/ Swift
This is really easy, download VisualStudio Code from Microsofts
Download Page,
and drag it to the /Applications folder.
One may also want to link up the code tool, so that VSC can be started
from the shell:
$ ln -s "/Applications/Visual Studio Code.app/Contents/Resources/app/bin/code" \
        /usr/local/bin/code
On startup, VSCode is going to show a little tutorial, though most things are self explanatory. The basics:
- They call the dock on the left the “activity bar”. It is roughly comparable
to the sidebar tab selector in Xcode. Relevant shortcuts:
⌘⇧ E: Jump into the “Explorer” (the file navigation pane) and if the focus is on the Explorer, back to the editor (thanks @pfriedrich_).⌘⇧ F: Open search pane.⌘⇧ D: Run & Debug pane (also seems to be used for tests).^⇧ G: Git pane.
- A terminal can be brought up using
Ctrl-Backtick(similar toM-x shell) - More shortcuts:
- Navigate forward/backward:
⌘⌥ </⌘⌥ > F5: Start in debugger,^ F5: just runF12: Jump to definition of a symbol⌘⇧ N: Open a new VSCode window⌘⇧ P: Open “command palette”, this is similar toM-xin Emacs, one can invoke all the available functions.⌘⌥ ^: Up/down for multiple cursors (multiline edits).
- Navigate forward/backward:
- Usually you seem to open just one “folder” in a VSCode window (similar to Xcode), which is your project root (though you can also create workspaces, again similar to Xcode).
Afterwards one can install the “Swift Language Support for Visual Studio Code” extension using the extensions button in the activity bar. Search for “Swift”, should be the top hit:
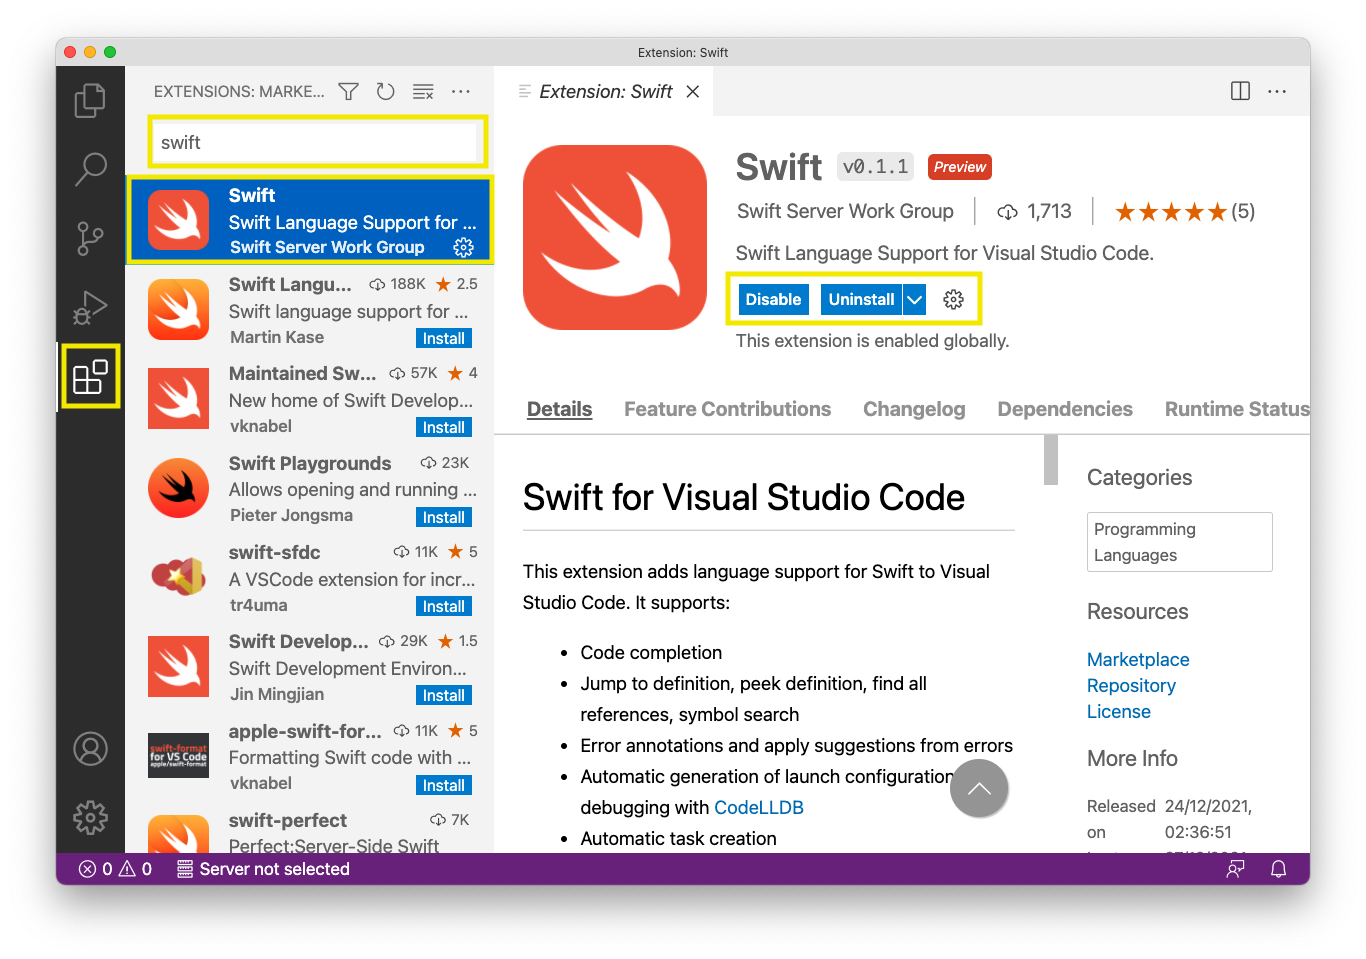
So far so gut, the ARI ran into no issues.
Setting up the SwiftPM Boilerplate
The new Swift extension for VisualStudio Code doesn’t yet support creating new Swift projects. So that part still has to be done in the shell.
First make sure that Swift 5.5 is active:
$ swift --version
swift-driver version: 1.26.21 Apple Swift version 5.5.2 (swiftlang-1300.0.47.5 clang-1300.0.29.30)
Target: arm64-apple-macosx11.0
If it is not: sudo xcode-select -s /Applications/Xcode.app.
Next create the package boilerplate:
$ mkdir Tows && cd Tows
$ swift package init --type executable
Creating executable package: Tows
Creating Package.swift
Creating README.md
Creating .gitignore
Creating Sources/
Creating Sources/Tows/main.swift
Creating Tests/
Creating Tests/TowsTests/
Creating Tests/TowsTests/TowsTests.swift
This needs to be massaged a little more.
First we need to rename the main.swift to something else.
main.swift is a special file which essentially wraps the whole content in
a big function (i.e. you can run statements like print("Moo!") at the top
level). This clashes with how @main works.
$ mv Sources/Tows/main.swift \
     Sources/Tows/Tows.swift
This can be opened in VisualStudio Code now, to do so, just type:
$ code .
It should come up like this:
Replace the contents (the print("Hello")) with our
app as shown above:
import SwiftUI

@main
struct HelloWorld: App {

  var body: some Scene {
    WindowGroup {
      Text("Hello World!").padding()
    }
  }
}
VSCode is going to show a set of errors:
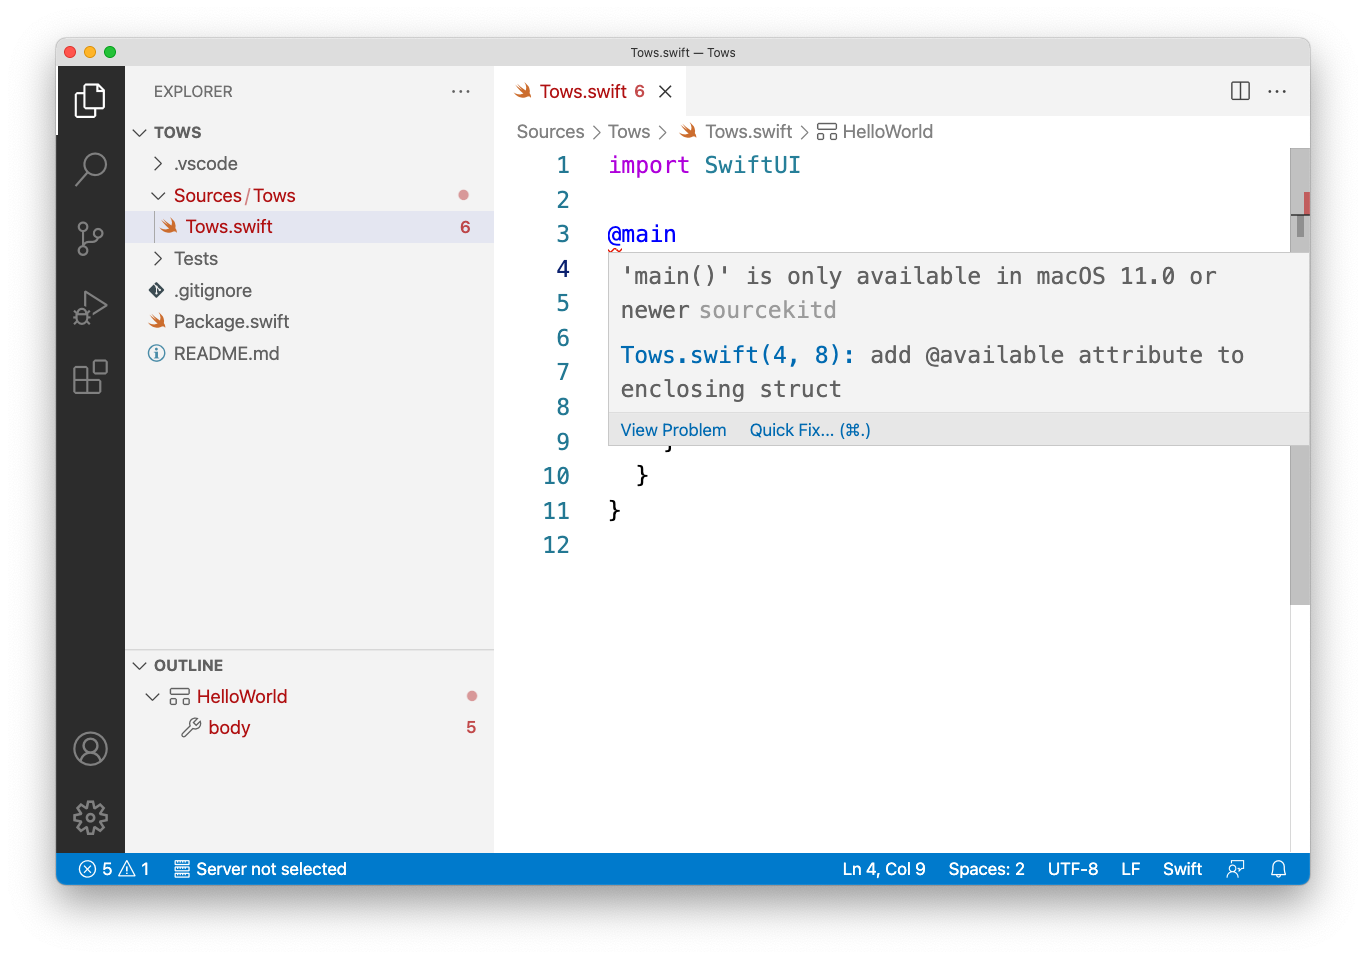
Oops. That says at least macOS BS is required. Easily fixed by adding that
requirement to our Package.swift file:
// swift-tools-version:5.5
import PackageDescription

let package = Package(
  name: "Tows",
  platforms: [ .macOS(.v11) ], // <= add this!
  dependencies: [],
  targets: [ .executableTarget(name: "Tows", dependencies: []) ]
)
And … errors still show.
Looks like the Swift extension still has a bug w/ refreshing things when the
platform changes.
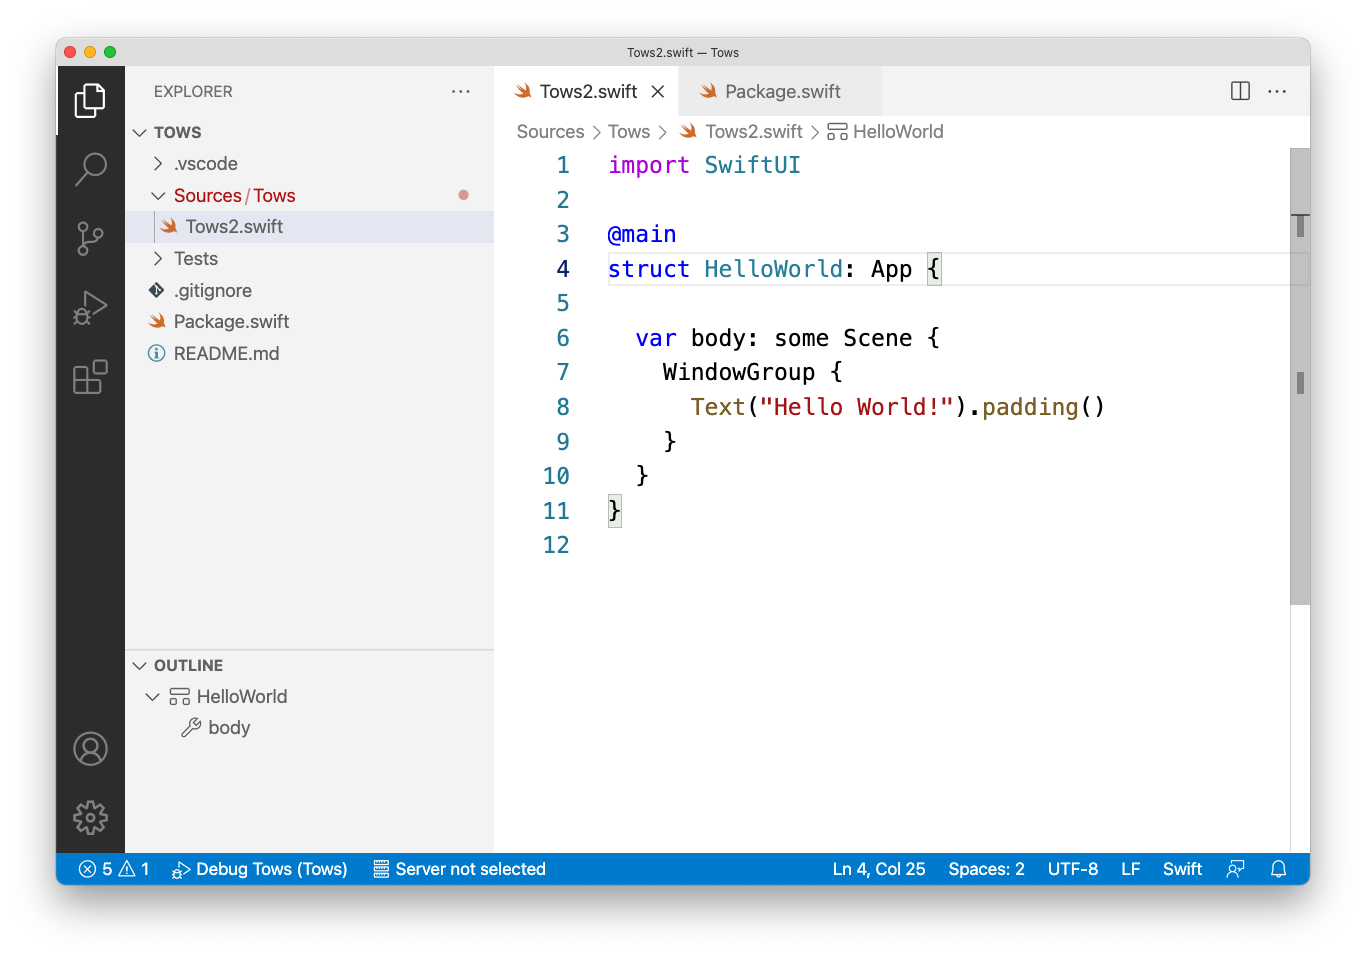
This can be worked around by renaming the Tows.swift file to Tows2.swift
(just click on the filename in the explorer),
and et voilà, the source looks proper now:
Excellent, let’s start our app in the debugger by pressing F5,
it just works. Magic:

Notice the little “Hello World” window, that’s the app:
You may have to search for the window, it is not put in front of your other windows.
IMPORTANT: This is not quite a full app yet. You’ll notice it has no menu bar and if you quit it, you’ll quit your editor instead 😈 To close it, you need stop it in the VSCode debugger.
Fixing the App Activation
To make the thing behave like an app proper,
a Cocoa with Love
trick
from 2010 has to be applied.
We are going to add an init to our App structure:
@main
struct HelloWorld: App {

  init() {
    DispatchQueue.main.async {
      NSApp.setActivationPolicy(.regular)
      NSApp.activate(ignoringOtherApps: true)
      NSApp.windows.first?.makeKeyAndOrderFront(nil)
    }
  }
  ...
}
Re-run the tool by pressing F5 again, it’ll have a menu proper and it can be quit as usual.
We are done. That is all which is required. But can we write more complex apps with that? Something cowtastic? Yes we can!
          (__)
        /  .\/.     ______
       |  /\_|     |      \
       |  |___     |       |
       |   ---@    |_______|
    *  |  |   ----   |    |
     \ |  |_____
      \|________|
CompuCow Discovers Bug in Compiler
🐮 A Cowtastic App 🐮
This thing, as a SwiftPM tool, in 82 lines of code (including support for search, selection and dragging):
We are going to use the Swift
cows
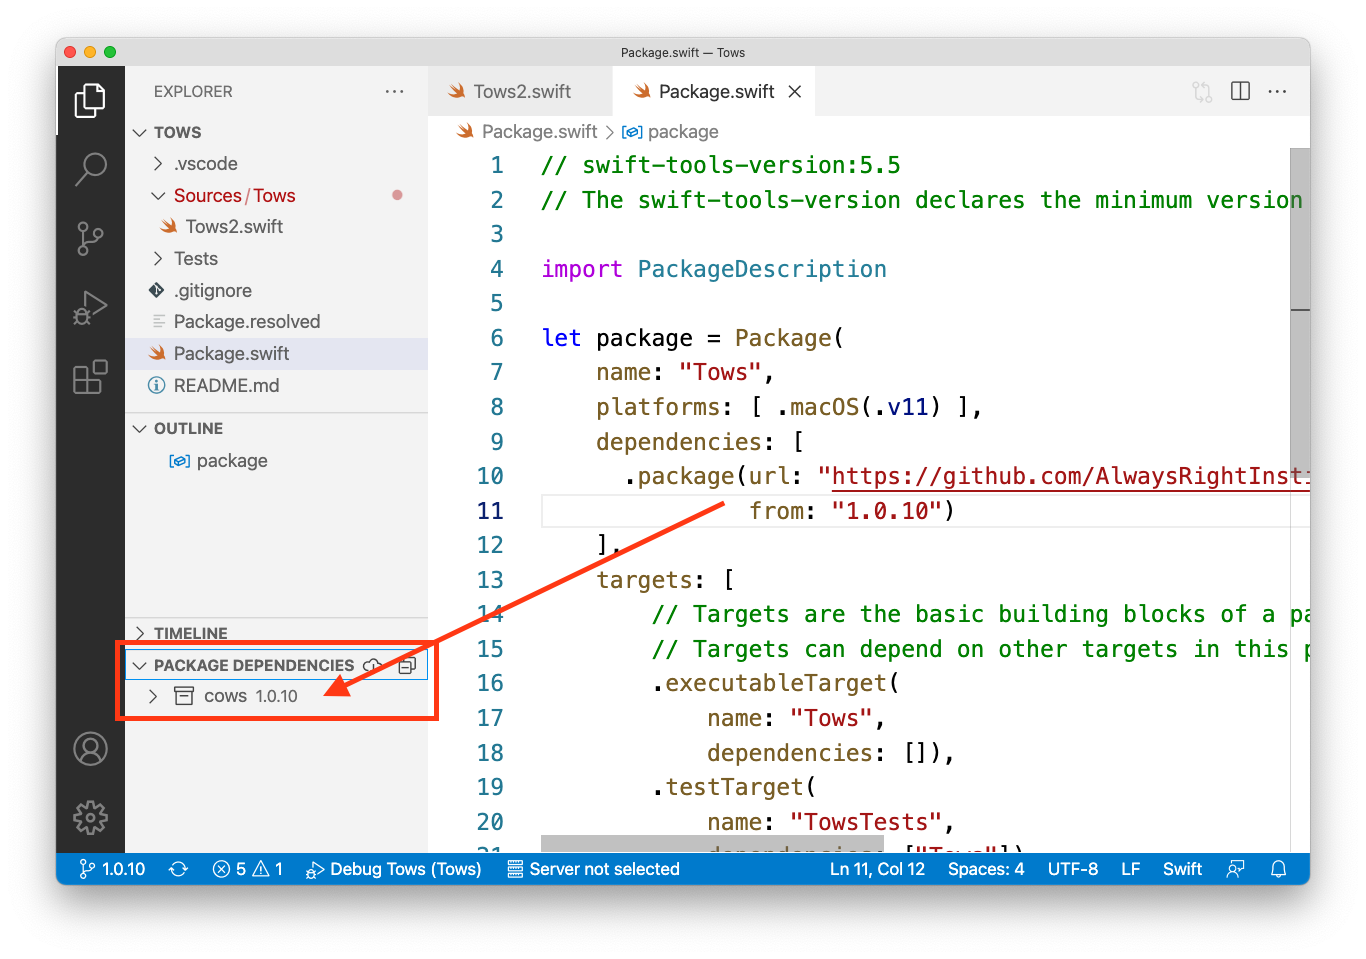
package, let’s add it as a dependency to Package.swift
(remember to add both, the package and the target dependency):
// swift-tools-version:5.5
import PackageDescription

let package = Package(
  name: "Tows",
  platforms: [ .macOS(.v11) ],
  dependencies: [ // add this:
    .package(url: "https://github.com/AlwaysRightInstitute/cows",
             from: "1.0.10")
  ],
  targets: [
    .executableTarget(name: "Tows",
                      dependencies: [ "cows" ]) // <= add this!
  ]
)
After doing this, a new “Package Dependencies” section will pop up in the sidebar:
Let’s update the application code. Gist: Tows.swift
import SwiftUI
import cows // @AlwaysRightInstitute

struct ContentView: View {

  @State var searchString  = ""
  @State var matches       = allCows
  @State var selectedCow   : String?

  let font = Font(NSFont
    .monospacedSystemFont(ofSize: NSFont.systemFontSize, weight: .regular))

  var body: some View {
    NavigationView {
      ScrollView {
        TextField("Search", text: $searchString)
          .textFieldStyle(RoundedBorderTextFieldStyle())
          .padding(8)
          .onChange(of: searchString) { nv in
            matches = nv.isEmpty
                    ? cows.allCows
                    : cows.allCows.filter { $0.contains(searchString) }
          }
        Spacer()
      }

      ScrollView {
        VStack(spacing: 0) {
          if matches.isEmpty {
            Text("Didn't find cows matching '\(searchString)' 🐮")
              .padding()
              .font(.title)
            Divider()
          }

          ForEach(matches.isEmpty ? allCows : matches, id: \.self) { cow in
            Text(verbatim: cow)
              .font(font)
              .onDrag { NSItemProvider(object: cow as NSString ) }
              .padding()
              .background(
                RoundedRectangle(cornerRadius: 16)
                  .strokeBorder()
                  .foregroundColor(.accentColor)
                  .padding(4)
                  .opacity(selectedCow == cow ? 1 : 0)
              )
              .frame(maxWidth: .infinity)
              .contentShape(Rectangle())
              .onTapGesture {
                selectedCow = selectedCow == cow ? nil : cow
              }
          }
        }
      }
      .ignoresSafeArea()
    }
  }
}

@main
struct Tows: App {

  init() {
    DispatchQueue.main.async {
      NSApp.setActivationPolicy(.regular)
      NSApp.activate(ignoringOtherApps: true)
      NSApp.windows.first?.makeKeyAndOrderFront(nil)
    }
  }

  var body: some Scene {
    WindowGroup {
      ContentView()
        .frame(minWidth: 640, minHeight: 320)
    }
    .windowStyle(HiddenTitleBarWindowStyle())
  }
}
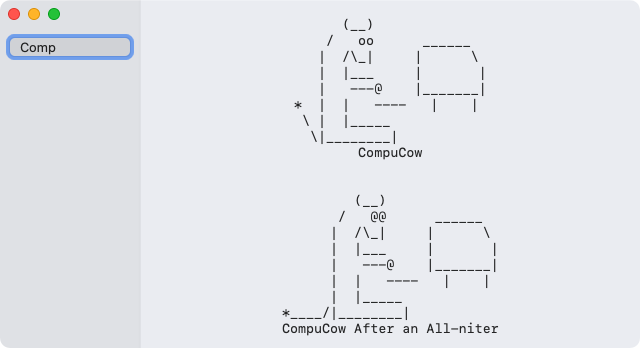
Just press F5 and a Cowtastic app is being started:

Closing Notes
Looks like a pretty nice Swift for Visual Studio Code extension. It still has some limitations, but Adam Fowler and Steven Van Impe did a great job.
Want to have a readymade app that is properly reviewed by Apple’s AppStore team?
 There is CodeCows.
Which (amongst other things) features a (language aware) Xcode extension (yes!)
and support for macOS services
(i.e. automatic ASCII Cows support in any Cocoa text field).
There is CodeCows.
Which (amongst other things) features a (language aware) Xcode extension (yes!)
and support for macOS services
(i.e. automatic ASCII Cows support in any Cocoa text field).
And for iOS there is ASCII Cows. Includes a Messages app and proper Markdown support, so that you can paste the cows into WhatsApp properly.
Links
- VisualStudio Code
- App Gist: Tows.swift
- Cowtastic apps:
- Packages:
- Original cows JavaScript module by Sindre Sorhus cows
- Inspiration:
- ObjC.io: SwiftUI: Running a Mac App Without an Xcode Project
- Cocoa with Love: Minimalist Cocoa programming
Contact
Feedback is warmly welcome: @helje5, me@helgehess.eu. GitHub.
Want to support my work? Buy an app! You don’t have to use it! 😀