
µExpress/NIO - Adding Templates
 Last week we built a tiny web framework
on top of the new
Swift NIO.
This time we are going to add support for
Mustache
templates.
Again the goal is to use a minimal amount of code
while still providing something useful.
Last week we built a tiny web framework
on top of the new
Swift NIO.
This time we are going to add support for
Mustache
templates.
Again the goal is to use a minimal amount of code
while still providing something useful.
Update 2019-06-25: Xcode 11 now includes some Swift Package Manager support. This may or may not work with the SwiftXcode setup described here. So for now consider this Xcode 10 only ;-) Also: This is for NIO 1 aka Swift 4.2. The overall concepts are exactly the same in NIO 2 (/Swift 5), but the API received some renaming. Note that the upstream µExpress works w/ both, NIO 1 and 2.
Using the µExpress we built last time, we can already make endpoints which send String content and even JSON to the client:
let app = Express()

app.get("/todomvc") { _, res, _ in
  res.json(todos)
}
app.get("/") { _, res, _ in
  res.send("Hello World!")
}

app.listen(1337)
Today we want to enhance this with the ability to use Mustache templates:
<html>
  <head><title>{{title}}</title></head>
  <body>
    <h1>{{title}}</h1>
    <ul>
      {{#todos}}
        <li>{{title}}</li>
      {{/todos}}
    </ul>
  </body>
</html>
in a way similar to
Express.js,
that is, using a render method:
app.get("/todos") { _ res, _ in
  res.render("todolist", [
    "title" : "Todos!",
    "todos" : todos
  ])
}
To end up with a result like this:
We are not going to add the whole functionality Express provides,
just a basic render
(for a more complete implementation you could check
Noze.io
or
ExExpress).
Project Setup
 Instead of fiddling around with Swift Package Manager,
we use
swift xcode
to use NIO directly within Xcode.
Grab Homebrew if you don’t have it yet, and install the
Swift NIO image
using:
Instead of fiddling around with Swift Package Manager,
we use
swift xcode
to use NIO directly within Xcode.
Grab Homebrew if you don’t have it yet, and install the
Swift NIO image
using:
brew install swiftxcode/swiftxcode/swift-xcode-nio
swift xcode link-templates
If you still have the project hanging around from the µTutorial on Swift NIO, you can just use that. If not, you can easily grab the last state, and create a new branch on top of it:
git clone -b nio-tutorial/5-json \
          https://github.com/NozeIO/MicroExpress.git
cd MicroExpress
git checkout -b nio-tutorial/6-templates
open MicroExpress.xcodeproj # open in Xcode
Ready to go!
The Plan
- First we are going to have a look at the NIO NonBlockingFileIO helper object. We need this to read our template in an asynchronous fashion (remember, we never want to block a NIO eventloop!)
- Second we are going to import a Swift Mustache library. We use the ARI one, but you could use any other (or even use a completely different template engine like Stencil).
- We bring the two things together
and add the
ServerResponse.render()method. - Finally we make use of the greatness and write a small Todolist HTML page, rendered server side via Mustache.
1. NonBlockingFileIO
You may remember from our previous tutorial
(and the NIO homepage)
that the whole point of NIO is to perform I/O operations
in a non-blocking way.
For example when we read from a socket, we essentially tell the system that
we want to know if data arrives, and continue doing other stuff. Only when some
data arrives, we pick it up.
Contrast that to a blocking system, in which
we would issue a read call and wait (block) until data arrives.
In Node/Express, which is also NIO, you would use the fs.readFile function to load a file into memory. Let us implement such a function using NIO:
public enum fs {
  static func readFile(_ path : String,
                       _ cb   : ( Error?, ByteBuffer? ))
}
To be used like this:
fs.readFile("/etc/passwd") { err, data in
  guard let data = data else {
    return print("Could not read file:", err)
  }
  print("Read passwd:", data)
}
Notice how the function takes a closure. This will be executed once the file is fully read. Without ever blocking our NIO eventloop.
NonBlockingFileIO
Swift NIO provides NonBlockingFileIO as a helper to read files. Why is that even necessary? It turns out that Posix non-blocking I/O often does not work on disk I/O (reading/writing files). That is, disk I/O operations are always blocking. To workaround that, NonBlockingFileIO uses a thread pool. This will perform the blocking operations for us and report back, when those are done.
To wrap it up:

// File: fs.swift - create this in Sources/MicroExpress
import NIO

public enum fs {

  static let threadPool : BlockingIOThreadPool = {
    let tp = BlockingIOThreadPool(numberOfThreads: 4)
    tp.start()
    return tp
  }()

  static let fileIO = NonBlockingFileIO(threadPool: threadPool)

  public static
  func readFile(_ path    : String,
                eventLoop : EventLoop? = nil,
                maxSize   : Int = 1024 * 1024,
                 _ cb: @escaping ( Error?, ByteBuffer? ) -> ())
  {
    let eventLoop = eventLoop
                 ?? MultiThreadedEventLoopGroup.currentEventLoop
                 ?? loopGroup.next()

    func emit(error: Error? = nil, result: ByteBuffer? = nil) {
      if eventLoop.inEventLoop { cb(error, result) }
      else { eventLoop.execute { cb(error, result) } }
    }

    threadPool.submit { // FIXME: update for NIO 1.7
      assert($0 == .active, "unexpected cancellation")

      let fh : NIO.FileHandle
      do { // Blocking:
        fh = try NIO.FileHandle(path: path)
      }
      catch { return emit(error: error) }

      fileIO.read(fileHandle : fh, byteCount: maxSize,
                  allocator  : ByteBufferAllocator(),
                  eventLoop  : eventLoop)
        .map         { try? fh.close(); emit(result: $0) }
        .whenFailure { try? fh.close(); emit(error:  $0) }
    }
  }
}
The code works but has some flaws (e.g. a large fixed size buffer) which you would fix in a full implementation. For demonstration and low-scale purposes only!
To make the code work, we need to expose our eventLoop.
For this we go the easy route and just make it a global variable (a kitten
just died 😱).
Open the Express.swift file and move the eventLoop out of the class to
the toplevel, from this:
open class Express : Router {

  let loopGroup =
    MultiThreadedEventLoopGroup(numThreads: System.coreCount)
to this:
let loopGroup =
  MultiThreadedEventLoopGroup(numThreads: System.coreCount)

open class Express : Router {
After this, the code should compile.
Discussion
First we create and start the threadPool we are going to use. Since Swift static/global variables are evaluated in a lazy way, this will only run, when we actually use it!
static let threadPool : BlockingIOThreadPool = {
  let tp = BlockingIOThreadPool(numberOfThreads: 4)
  tp.start()
  return tp
}()
Next we are creating the NIO helper object, which just takes the thread-pool:
static let fileIO = NonBlockingFileIO(threadPool: threadPool)
Finally our readFile function.
That starts with some eventLoop processing logic:
let eventLoop = eventLoop
             ?? MultiThreadedEventLoopGroup.currentEventLoop
             ?? loopGroup.next()
It reads like this:
- If the caller specified an event loop explicitly (when calling
readFile), use it. - Otherwise, check whether we are invoked from within an event loop, most likely a NIO stream handler. If yes, use that event loop.
- If neither, use our global, shared
loopGroupto create a new one. If we run into this, we likely got called outside of an event loop, e.g. to load some config file before starting the server.
We also define a small emit function, which ensures that we report
errors and results back on the selected event loop.
The next part is interesting. We submit an own task to the thread pool via:
threadPool.submit {
   ...
   fh = try NIO.FileHandle(path: path)
}
We do this, because FileHandle(path: path) is also a blocking operation.
Ever had Finder show the Spinning Beachball? That is likely because
it is blocking on such a call.
This we need to avoid, hence we dispatch the call to the threadpool too.
This needs an update for newer NIO versions, which include non-blocking open operations.
Then we finally use the NIO helper and perform a read. We load the whole file in one go to keep it simple:
fileIO.read(fileHandle : fh, byteCount: maxSize,
            allocator  : alloc,
            eventLoop  : eventLoop)
  .map         { try? fh.close(); emit(result: $0) }
  .whenFailure { try? fh.close(); emit(error:  $0) }
Read returns a
Future,
which we already discussed in the
previous tutorial.
A Future is a handle to something which is not yet available. In this
case read returns immediately with the future, but the actual value will
come in later, asynchronously.
The map block will run if the operation was successful. In this case we
close the file, and return the buffer we got.
The whenFailure block will run if the operation failed. In this case we
also close the file, and return the error.
Thats it!
Want to try it? You can put this into your main.swift and run the programm:
// File: main.swift - Add to existing file
let app = Express()

fs.readFile("/etc/passwd") { err, data in
  guard let data = data else { return print("Failed:", err) }
  print("Read passwd:", data)
}
So we have a function which can read a file asynchronously, without blocking an event loop. We are going to use this function to load our Mustache template.
Don’t forget about Grand Central Dispatch
All this is pretty complex and intended as a demonstration of NIO. Something similar could be accomplished using Foundation quite easily:
DispatchQueue.global().async {
  do    { cb(nil,   try Data(contentsOf: fileurl)) }
  catch { cb(error, nil) }
}
There are pros and cons in that which are out of scope for this blog entry :-)
2. Add Mustache Library
The fs.readFile was most of the work already, the rest is low hanging fruits.
To parse a Mustache template
we are going to use the
ARI Mustache library.
You could use any other (or even use a completely different template engine
like Stencil).
To import the library we need to adjust our Package.swift file. Do not forget
to add the dependency to the target as well!
// File: Package.swift - add to dependencies (below NIO):
.package(url: "https://github.com/AlwaysRightInstitute/mustache.git",
         from: "0.5.1")

// File: Package.swift - add to target dependencies:
dependencies: [
  "NIO",
  "NIOHTTP1",
  "mustache" // <= new one
])
Rebuild, which will take a moment as the package is fetched & built (one time thing).
3. ServerResponse.render
Bringing together our fs.readFile and the mustache library,
we extend the ServerResponse object with a new render method.
This is how we call it later:
app.get("/") {
  response.render("index", [ "title": "Hello World!" ])
}
It takes the name of the template file, and - optionally - some object.
The keys of the object (e.g. a dictionary) are then available within Mustache in
{{title}}
like variables.
The implementation, discussion is below:
// File: ServerResponse.swift - Add at the bottom

import mustache

public extension ServerResponse {

  public func render(pathContext : String = #file,
                     _ template  : String,
                     _ options   : Any? = nil)
  {
    let res = self

    // Locate the template file
    let path = self.path(to: template, ofType: "mustache",
                         in: pathContext)
            ?? "/dummyDoesNotExist"

    // Read the template file
    fs.readFile(path) { err, data in
      guard var data = data else {
        res.status = .internalServerError
        return res.send("Error: \(err as Optional)")
      }

      data.write(bytes: [0]) // cstr terminator

      // Parse the template
      let parser = MustacheParser()
      let tree   : MustacheNode = data.withUnsafeReadableBytes {
        let ba  = $0.baseAddress!
        let bat = ba.assumingMemoryBound(to: CChar.self)
        return parser.parse(cstr: bat)
      }

      // Render the response
      let result = tree.render(object: options)

      // Deliver
      res["Content-Type"] = "text/html"
      res.send(result)
    }
  }

  private func path(to resource: String, ofType: String,
                    in pathContext: String) -> String?
  {
    #if os(iOS) && !arch(x86_64) // iOS support, FIXME: blocking ...
      return Bundle.main.path(forResource: template, ofType: "mustache")
    #else
      var url = URL(fileURLWithPath: pathContext)
      url.deleteLastPathComponent()
      url.appendPathComponent("templates", isDirectory: true)
      url.appendPathComponent(resource)
      url.appendPathExtension("mustache")
      return url.path
    #endif
  }
}
Discussion
Template Lookup
The user passes in just the name of the template, for example “index”. We need to somehow map this to a filesystem path, for example:
/Users/helge/Documents/
  MicroExpress/Sources/MicroExpress/
  templates/index.mustache
In an iOS or macOS application you would just put the template into a resource
and use Bundle.main.path() to look it up.
Unfortunately SPM projects do not yet support resources, so we have to resort
to a trick (thanks Ankit!):
public func render(pathContext : String = #file, ..)
Notice how pathContext defaults to #file. This will expand to the path
of the Swift source file calling render.
For example if you call it from a route you define in our main.swift,
it could resolve to:
/Users/helge/Documents/
  MicroExpress/Sources/TodoBackend/
  main.swift
In other words, it gives us a reasonable “base path” to lookup resources.
Note that in our code, we lookup templates in the templates subdirectory!
Careful with this trick, for deployment you need another way to lookup your resources - the sources will be gone and the path very likely different!
Reading, Parsing and Delivering
The rest of the code is relatively straight forward:
- we
fs.readFileour template, - we parse it using the
MustacheParserprovided by themustachemodule, - we evaluate the Mustache template, which creates a String,
- and we send that String using the
sendmethod we already had.
There is that withUnsafeReadableBytes blob.
This is an unnessary micro optimization to avoid creating a String.
Since we know our file contains UTF-8 data, we can directly pass over the buffer
to the MustacheParser.
Summary
That’s all we need in our tiny web framework.
We now have a fs.readFile function to asynchronously read files,
and - more importantly - we got a ServerResponse.render
function which can load, evaluate and deliver Mustache templates.
Let’s use it!
4. Todolist
As part of our µExpress tutorial we already integrated
a web scale in-memory todo database.
Which we can access like a regular Array, because, well, it is an Array.
It lives in TodoModel.swift:
// File: TodoModel.swift

struct Todo : Codable {
  var id        : Int
  var title     : String
  var completed : Bool
}

let todos = [
  Todo(id: 42,   title: "Buy beer",
       completed: false),
  Todo(id: 1337, title: "Buy more beer",
       completed: false),
  Todo(id: 88,   title: "Drink beer",
       completed: true)
]
In the last tutorial we sent that data as JSON to the Todo-Backend client, simply using:
// File: main.swift

app.get("/todomvc") { _, res, _ in
  res.json(todos)
}
Today we want to render that data ourselves, that is, create a HTML page
from it. Add this route to your main.js:
// File: main.swift - add before catch-all route!

app.get("/todos") { _, res, _ in
  res.render("Todolist", [ "title": "DoIt!", "todos": todos ])
}
Notice how we pass over the todo items from our database to mustache.
Next we create our template. Create a new file called Todolist.mustache
in a new directory called templates. Right besides our main.swift
file. I.e. in Sources/TodoBackend/templates/Todolist.mustache.
It should look like this:
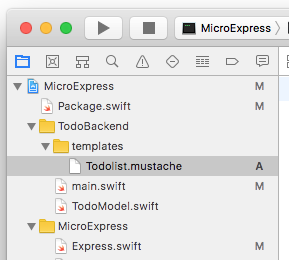
Make sure you do NOT add it to the target (or disable localization). Otherwise Xcode will put it into the en.lproj directory.
Add the following Mustache as the template:
<html>
<head><title>{{title}}</title></head>
<body>
<h1>{{title}}</h1>
<ul>
{{#todos}}
<li>{{title}}</li>
{{/todos}}
</ul>
</body>
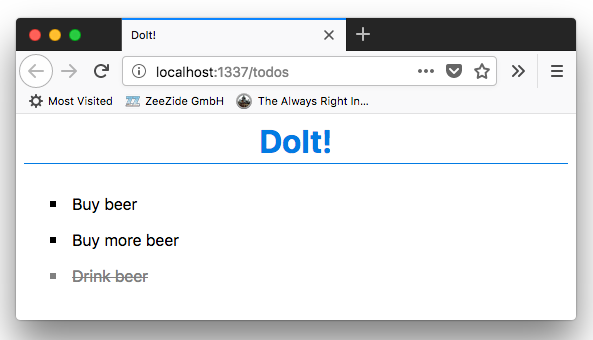
</html>Rebuild and run your application. Then hit http://localhost:1337/todos. It should work and display something like:
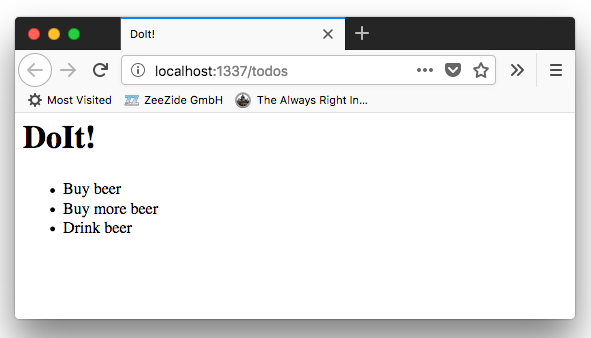
The {{#todos}} loops over our todo array, and the {{title}} within grabs the title of the todo.
This is all great, but poooh, a little on the ugly side … And now let’s experience the power of templates! We don’t have to recompile and restart our server, we can just adjust our Mustache template, reload in the browser and boom: Nice!
The template:
<html>
  <head>
    <title>{{title}}</title>
    <style>
      h1, li { font-family: -apple-system, sans-serif; }
      h1 {
        color:           rgb(2, 123, 227);
        border-bottom:   1px solid rgb(2, 123, 227);
        padding-bottom:  0.1em;
        text-align:      center;
        font-size:       2em;
      }
      ul li   { padding: 0.5em; }
      ul      { list-style-type: square; }
      li.done {
        text-decoration: line-through;
        color:           gray;
      }
    </style>
  </head>
  <body>
    <h1>{{title}}</h1>
    <ul>
      {{#todos}}
        <li class="{{#completed}}done{{/}}">{{title}}</li>
      {{/todos}}
    </ul>
  </body>
</html>Closing Notes
Template Includes
The ARI Mustache library also supports templates which include other templates!
{{> header }}   <!-- includes the header.mustache template -->
... content ...
{{> footer }}
ExExpress contains an example on how to do this. Spoiler: Easy to add!
Content Negotiation
In the example we use different endpoints for the JSON delivery of the todos, and the HTML delivery of the todos. We could also use content-negotiation to switch between the two: check ExExpress for a sample.
The Noze.io TodoMVC backend also has a demo for that.
Fight! (err, result) vs. Result<T>
We use the Node (err, result) convention for passing results to callback
closures.
The motivation is three-fold:
- Match what Node and even iOS itself does,
Result<T>can be awkward to deal with in Swift (if case letanyone?),async func throws -> Tis the proper solution for the issue and will hopefully arrive eventually.
A word on Streaming
Above we load the whole Mustache template into memory, evaluate it in memory
and write the result back to NIO in a single operation.
This is not how you would write a high performance NIO server.
Ignoring caching, you would usually read chunks of bytes as they become
available,
parse them into Mustache nodes in an NIO handler as they come in,
evaluate them,
and stream them back out to the socket.
In Noze.io or Node this would look something like:
func render(_ path: String) {
  fs.createReadStream(path) | mustache | self
}
Stay tuned! 🤓
Links
- MicroExpress package on GitHub (contains branches of all tutorial steps!)
- swift-nio
- Redi/S (Redis server written using NIO)
- SwiftNIO-IRC (IRC chat
- Express.js
- Noze.io
- ExExpress
- SPM
Contact
As usual we hope you liked this! Feedback and corrections are very welcome!
Hey, we love feedback!
Twitter, any of those:
@helje5,
@ar_institute.
Email: me@helgehess.eu.