Bringing Swift NIO to the iPhone
Friday, time for a fun project! Today we are going to bring Swift NIO (yes, that new Swift server framework) to the mobile device. Why? Because we can! Along the way we disrupt Google search. Oh no. It is Monday only …
Last week we released a
µTutorial on Swift NIO
and built a small web framework as part of this,
µExpress.
End of last year we wrote a now-outdated
tutorial on the Swift Server API project.
Though the API used is outdated now,
it already contained our web-scale cow database
and the Google-like search power to process it.
Today we are combining the two to build something new.
Not interested to read? Just wanna see? At the bottom: Video.
Project Setup
Update 2019-06-25: Xcode 11 now includes some Swift Package Manager support. This may or may not work with the SwiftXcode setup described here. So for now consider this Xcode 10 only ;-)
 Instead of fiddling around with Swift Package Manager,
we use
swift xcode
to setup NIO within Xcode.
Go grab Homebrew if you don’t have it yet, and install
swift xcode
using:
Instead of fiddling around with Swift Package Manager,
we use
swift xcode
to setup NIO within Xcode.
Go grab Homebrew if you don’t have it yet, and install
swift xcode
using:
brew install swiftxcode/swiftxcode/swift-xcode
swift xcode link-templates
(you can also install the Swift NIO image, to conveniently play w/ regular NIO servers).
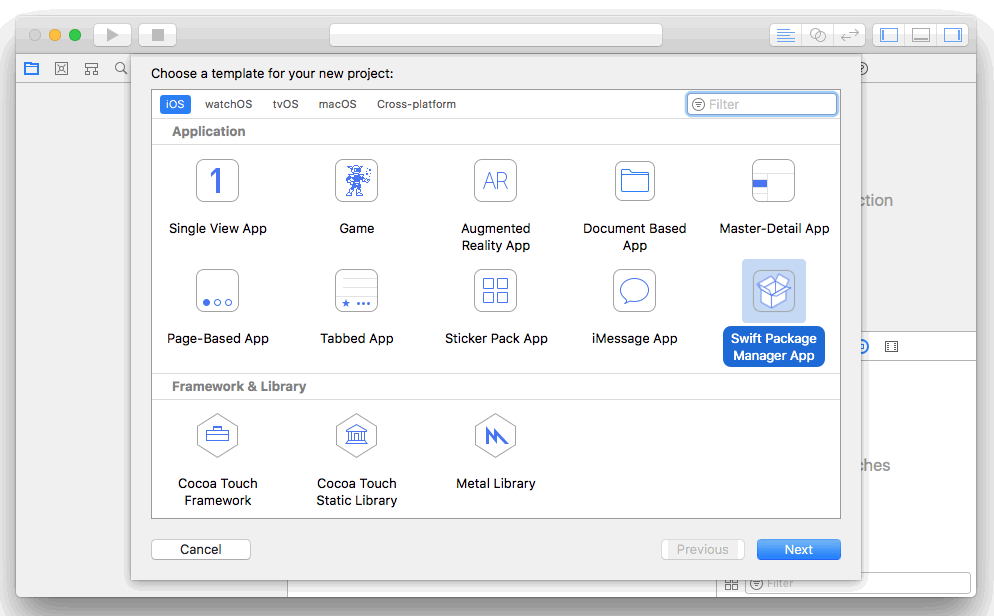
Within Xcode, create a new project (⌘-Shift-N), go to the “iOS” section and select the “Swift Package Manager App” template (do not use “macOS/Swift NIO”, which is for regular, non-iOS servers):

In the Project options, select the “Use the SPM ‘cows’ module.” option:
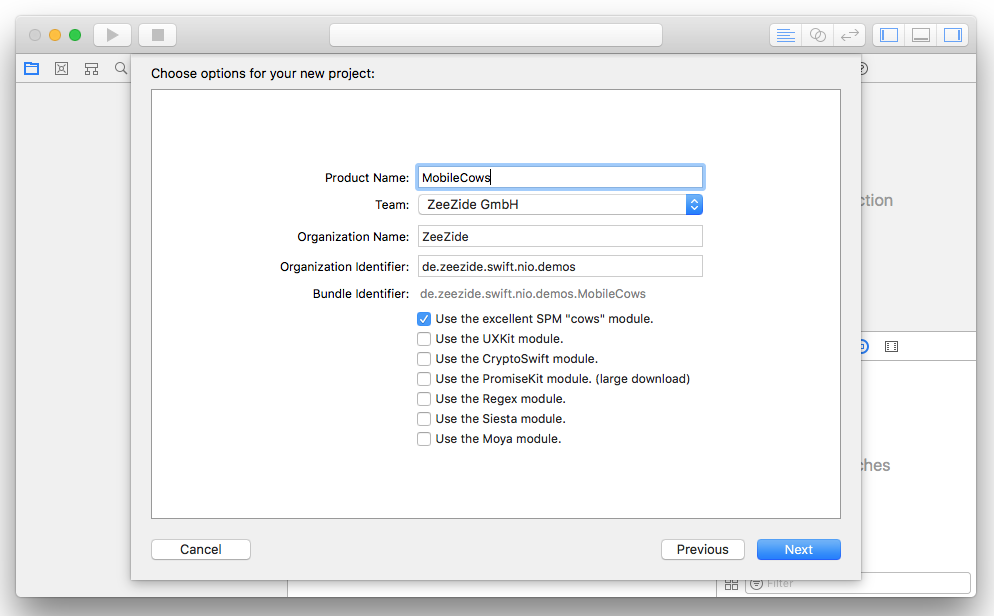
Select a place where you want to store it, build the project (⌘-b) and off we go.
Import NIO in Package.swift
Next we need to tell Xcode / the Swift Package Manager that we want to use
Swift NIO
and
µExpress.
Open the Package.swift file and add the necessary package references.
Do not forget to add the packages to the dependencies of the target itself.
It should look like this:
// swift-tools-version:4.0
import PackageDescription

let package = Package(
    name: "MobileCows",

    dependencies: [
        .package(url: "https://github.com/AlwaysRightInstitute/cows.git",
                 from: "1.0.0"),
        .package(url: "https://github.com/NozeIO/MicroExpress.git",
                 .branch("branches/swift-nio-lib"))
    ],

    targets: [
        .target(name: "MobileCows",
                dependencies: [
                  "cows", "MicroExpress"
                ],
                path: ".")
    ]
)
MicroExpress pulls in NIO as a dependency. You can, but you don’t have to, import NIO explicitly.
Build the project (⌘-b) again. This will take a moment (one time process) as it fetches the NIO, MicroExpress and Cows packages from the Internet and then builds them.
OK, we are good to go!
Scale it up! Add a Swift NIO server to the App.
What we are going to do is host a Swift NIO server within our iOS application. When the app finished launching, we are going to bring up our NIO server.
At the top of the AppDelegate.swift file, import MicroExpress:
// File: AppDelegate.swift

import MicroExpress
Add this code to the application(didFinishLaunching...) method:
// File: AppDelegate.swift

func application(_ app: UIApplication,
                 didFinishLaunchingWithOptions
                   opts: [UIApplicationLaunchOptionsKey: Any]?) -> Bool
{
    let app = Express()

    app.get("/") { req, res, _ in
        res.send("Hello World")
    }

    Thread.detachNewThread {
        app.listen(1337)
    }

    return true
}
We setup an Express application,
check µTutorial on Swift NIO to see how this works and
builds on top of Swift NIO.
Afterwards we add a route, which responds to a GET HTTP request hitting the
server root. Right now, we just send back a "Hello World".
Then we do something wasteful to please our µExpress API (we can do better).
Since the call to listen(port) will block (forever),
we run it in a background thread.
This thread won’t actually do anything but wait for the NIO server to finish.
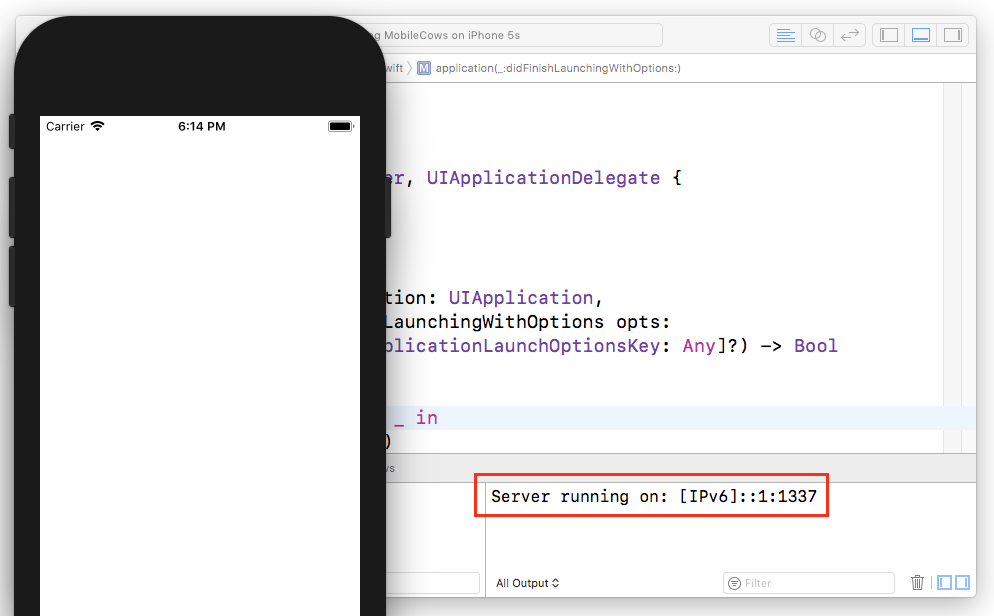
OK, great. If you want, you can start your app and access the server. The UI of the iOS app itself is still empty, but you can see that the server launched on the device in the console:
And, even better, you can already access the server using a browser! If you are on the simulator, you can just access it via: http://[::1]:1337/. If you are running on device, you need to figure out the IP address of your device, and you can do the same:
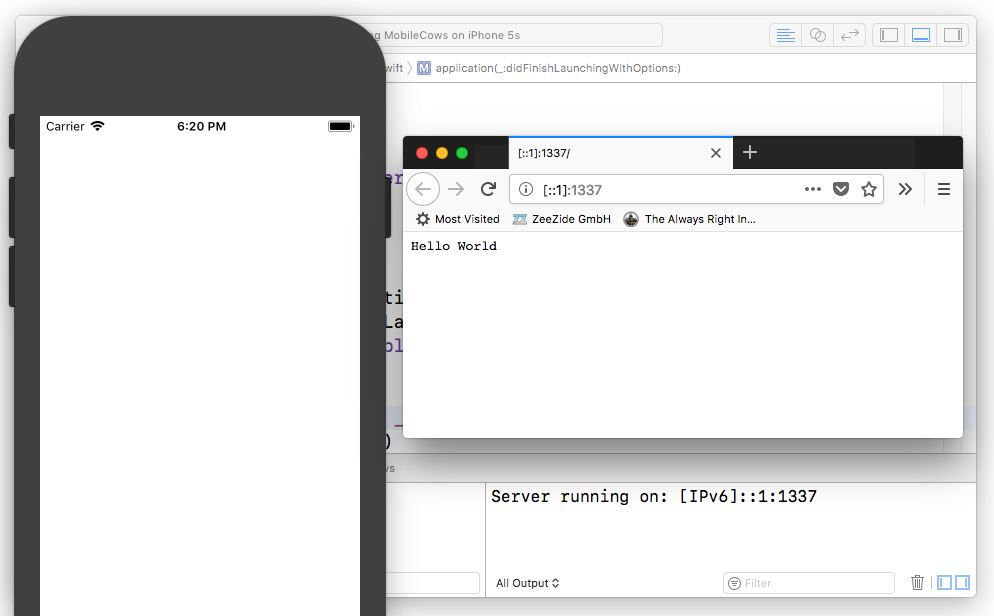
What we have here is a Swift NIO based HTTP server, directly running on an iOS device!
I hope I don’t break any NDAs by revealing this: Few know it, but iCloud was named iCloud because the service runs on returned iPhones with broken displays. Usually too expensive to repair, Apple is serious in its environmental efforts and reuses such hardware in new and exciting ways! (this is also the reason why iCloud used to be a little slow, back then the racks didn’t knew better and had been holding them wrong).
And what software enables that? Swift NIO of course.
Let the App have a UI
On the go, we don’t want to open our ChromeBook to access our server. So let’s add a UI to our app, which can target the server. We keep it very simple and use a WKWebView as our main driver.
Open your Main.storyboard file, and
drag a WebKit View (WKWebView) into your View Controller:
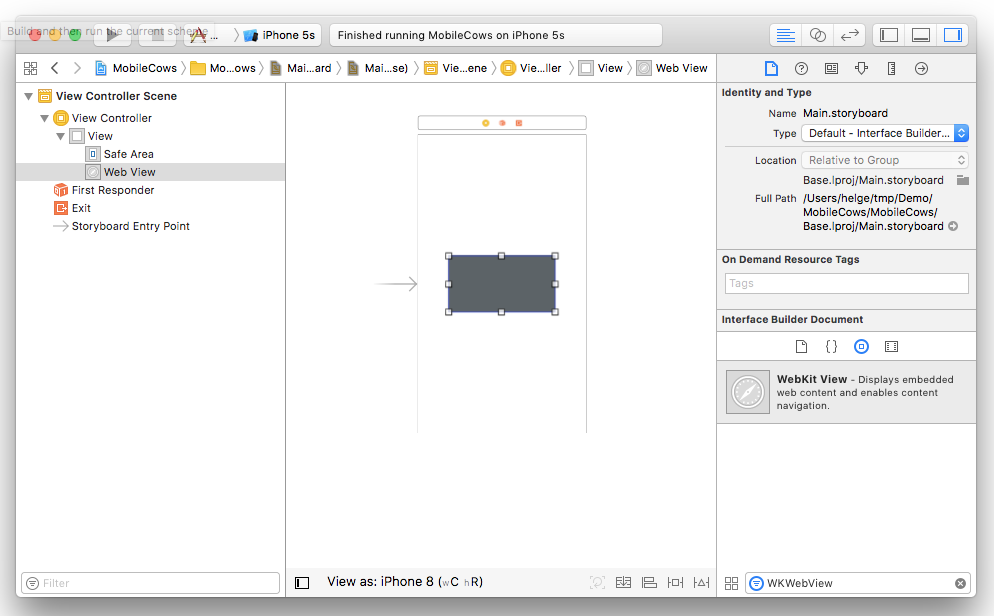
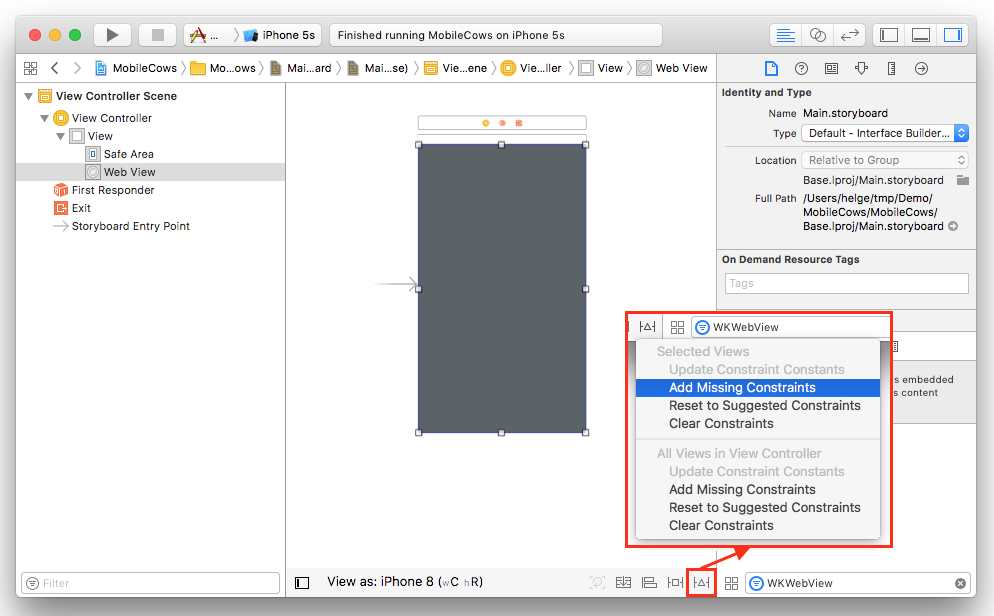
Resize the view, so that it matches the blue page guides, then use the triangle button and select “Add Missing Contraints”. Which, conincidentially, will add missing constraints.
To create an outlet to the WebView in our View Controller, open the Assistant Editor (using the two “rings” in the toolbar). Then Control-Drag from the WebView to the source file to create the outlet:
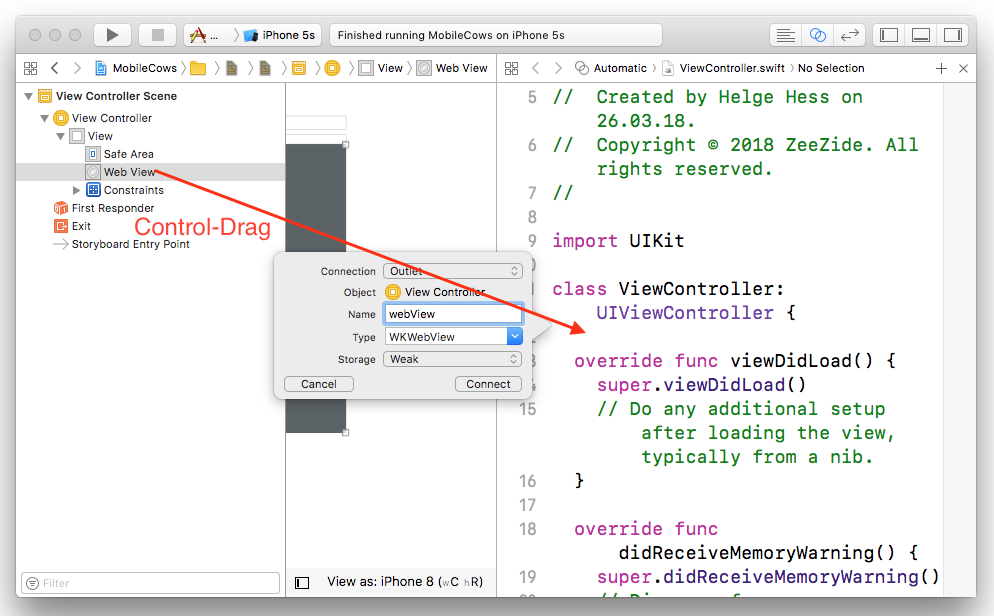
Leave the Assistant Editor, open the ViewController.swift.
It now has the instance variable pointing to the WebView.
Xcode is also showing an error: We need to import WebKit in the
View Controller:
// File: ViewController.swift - add somewhere at the top

import WebKit
Excellent. Almost there. What we want next is that the View Controller is
going to show our web page when it is displayed. To do this, we override
the viewWillAppear method:
// File: ViewController.swift - add this method to the class

override func viewWillAppear(_ animated: Bool) {
  super.viewWillAppear(animated)

  let url = URL(string: "http://[::1]:1337/")!
  let req = URLRequest(url: url)
  self.webView?.load(req)
}
The code is straightforward.
We create a URL pointing to our server
(running on the IPv6 “localhost address”),
we create a URLRequest targetting that URL,
and then we tell the WebView to execute the
URLRequest.
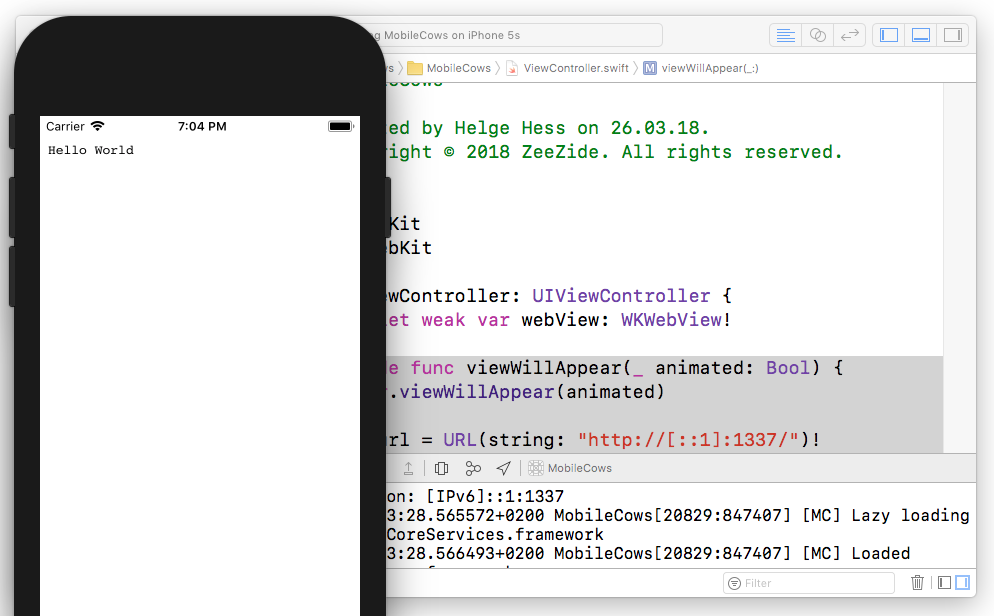
Go ahead! Build and run the project. The app will start up and the
“Hello World” sent by our server will show up:
The device runs the server, and it runs a web browser hitting that server. In an incredibly scalable way. At this point we are essentially done, but we want to add our award-winning webscale cow database.
Cows, lotta Cows 🐄🐂🐄
Let’s beef it up, and compete against Google on search - right on the device! In a first step, we are going to wrap a webscale cows database in a MicroExpress HTTP endpoint.
Make sure to import the awesome cows module at the top:
// File: AppDelegate.swift - put somewhere at the top

import UIKit
import MicroExpress
import cows // <-- add this
Adjust the middleware code in AppDelegate.swift to match this:
// File: AppDelegate.swift - adjust the launch-method

let app = Express()

app.use(querystring)

app.get("/") { req, res, _ in
  let q = req.param("q")?.lowercased() ?? ""

  let cow = q.isEmpty
    ? vaca()
    : (allCows.first(where: { $0.lowercased().contains(q) })
       ?? "No such cow")

  return res.render("index", [ "cow": cow ])
}
Before our own route runs, make sure to hook up the
querystring middleware, which is part of µExpress
(here is how it works: µTutorial on Swift NIO).
That middleware parses “query parameters” in the URL passed to the server,
for example:
http://x:1337/?q=Hello
In that q is the name of the query parameter,
and Hello the value associated with it.
Looking at the handler function we do those steps:
- We grab the query parameter
q, lowercase it for search. If there was no query parameter, we use the empty string. - We check if the query parameter is empty,
- if so: we generate a random cow via
vaca() - otherwise, we search whether any cow matches the string and return it.
- In case none matched, we return “No such cow”
- if so: we generate a random cow via
- Then we tell the response to render the
indexMustache template, and we pass over thecowwe found using the advanced search algorithm above.
You can build, but you can’t run.
You probably noticed already: What is that “index” Mustache template we try to render? We don’t have that yet! (We added Mustache support to µExpress in yet another tutorial.)
Add the template. Create a templates directory alongside your sources:
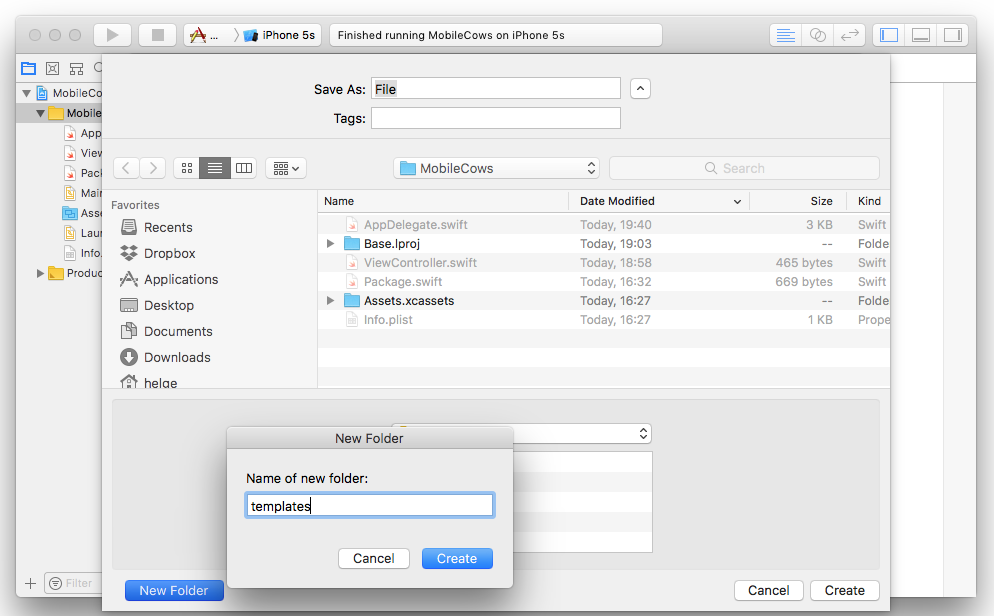
Put the new index.mustache file into it:
<html>
<!-- File: templates/index.mustache -->
<head>
<meta name="viewport"
content="user-scalable=no,
initial-scale=1, maximum-scale=1, minimum-scale=1,
width=device-width">
<style>
body { font-family: -apple-system, sans-serif; }
h1 {
color: rgb(2, 123, 227);
border-bottom: 1px solid rgb(2, 123, 227);
padding-bottom: 0.1em;
text-align: center;
font-size: 2em;
}
</style>
</head>
<body>
<h1>Mobile Cows</h1>
<center>
<form action="/" method="get">
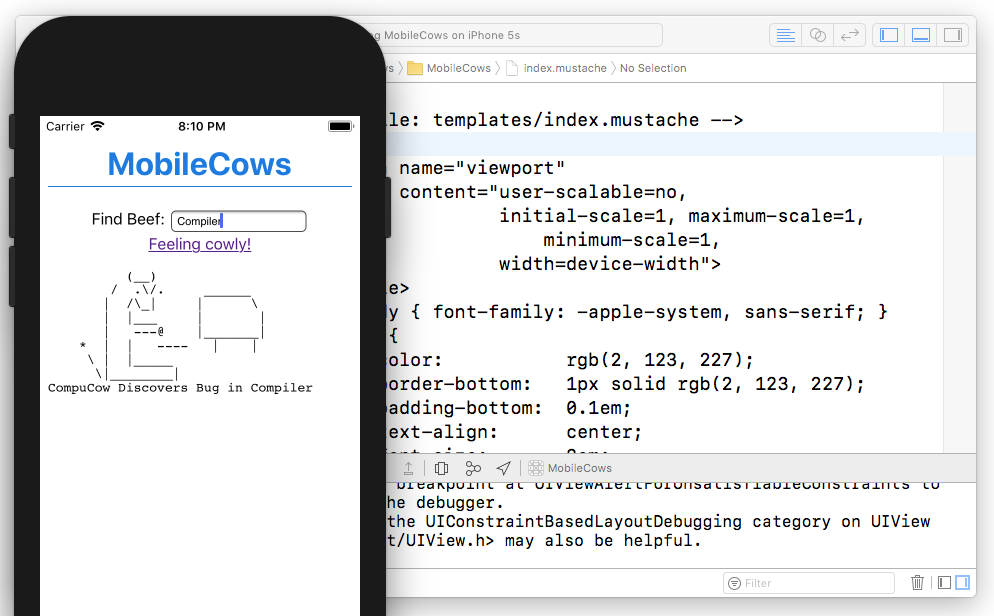
Find Beef: <input name="q" placeholder="e.g. 'compiler'"><br/>
<a href="/">Feeling cowly!</a>
</form>
</center>
<pre>{{cow}}</pre>
</body>
</html>This is some “mobile HTML” boilerplate, including some CSS to make it look
nice.
The body of the page contains a regular HTML form to enable our cowsy search
functionality
and a link to generate random cows.
Finally it contains the Mustache marker
{{cow}}
to render the cow we pass in
via:
res.render("index", [ "cow": cow ])
Thats it! Build and run, and access vast amounts of beef delivered in a web-scale way using Swift NIO:
Finishing Up
Really the only thing you still have to do before submitting a competitor to ASCII Cows to the App Store is an icon. Done.
Technical Notes
Client Side Swift NIO
Swift NIO is not only useful for writing server side code, but you can also
use it to build network clients. Like an IRC or IMAP4 client.
Be careful with that for now! Even though we never experienced that in the
wild w/ GCD, using Swift NIO might not activate the necessary phone
radios to get Internet access.
Checkout swift-nio #130
if you are interested in the details.
iOS Multi-Tasking
The demo above actually does not work properly in the context of multi-tasking.
If the user puts the app in the background, the kernel will eventually reclaim
the port the server is listening on.
So if you actually want to do something like above for whatever reason
(maybe a Pied Piper competitor),
you need to tear down the server when the app goes into background,
and you need to rebind/listen the server when the app is coming back
to the foreground.
Also, you probably want to use a kernel assigned port, instead of using a
hardcoded one.
Checkout the iOS networking articles on the details!
WebKit / Server Race
It may be obvious, but there is actually a race between the server starting up and the WebView being loaded. That is, the server might not be running yet when the WebView hits the local URL. Fortunately NIO startup is much faster than WebKit startup here, so it doesn’t matter for the demo.
Links
Contact
Hey, we love feedback!
Twitter, any of those:
@helje5,
@ar_institute.
Email: me@helgehess.eu.
Video